Braid Headband
Hair Styles Updos
Technology & Innovation
The first hairstyle I chose to have a crack at was a braid headband which I found a tutorial video for on Instagram which I will link below. My first attempt at the braid headband was mostly unsuccessful. First, I did not section my hair properly which led to random extra strands of hair getting in the way. Next, I braided my small section of hair without any kind of gel or water, so there were lots of little flyaways that resulted in the style looking messy. Lastly, I struggled to get the braids to stay in place. I was supposed to attach the ends of each braid to the other side of my hair with a small clear elastic, but the braids kept slipping too far back on my head making my hair even more frizzy! Unfortunately, time was running out and I had to abandon the hairstyle to make it to my class. In order to redeem myself, I decided to reattempt the same hairstyle later that day! This time I sectioned my hair more carefully, using hair ties to hold the extra hair out of the way. Then I used a spray gel which I brushed through the strands I wanted to braid and some hairspray which I sprayed on after the braids were done. Having organized sections made it significantly easier to attach the braids to either side of my head! I chose to give the whole front of my hair one final spray of hairspray to help avoid frizz and flyaways. My second attempt at the hairstyle was much more successful! I would consider wearing it again because I liked how it looked, and it was surprisingly comfortable despite the small clear elastics! One of my main struggles with this hairstyle was due to the lack of instruction in the video. I simply had to watch it and figure out what exactly the creator was doing. It also forced me to problem solve on my own, having to figure out what products I thought would work and what products I had on hand to try!
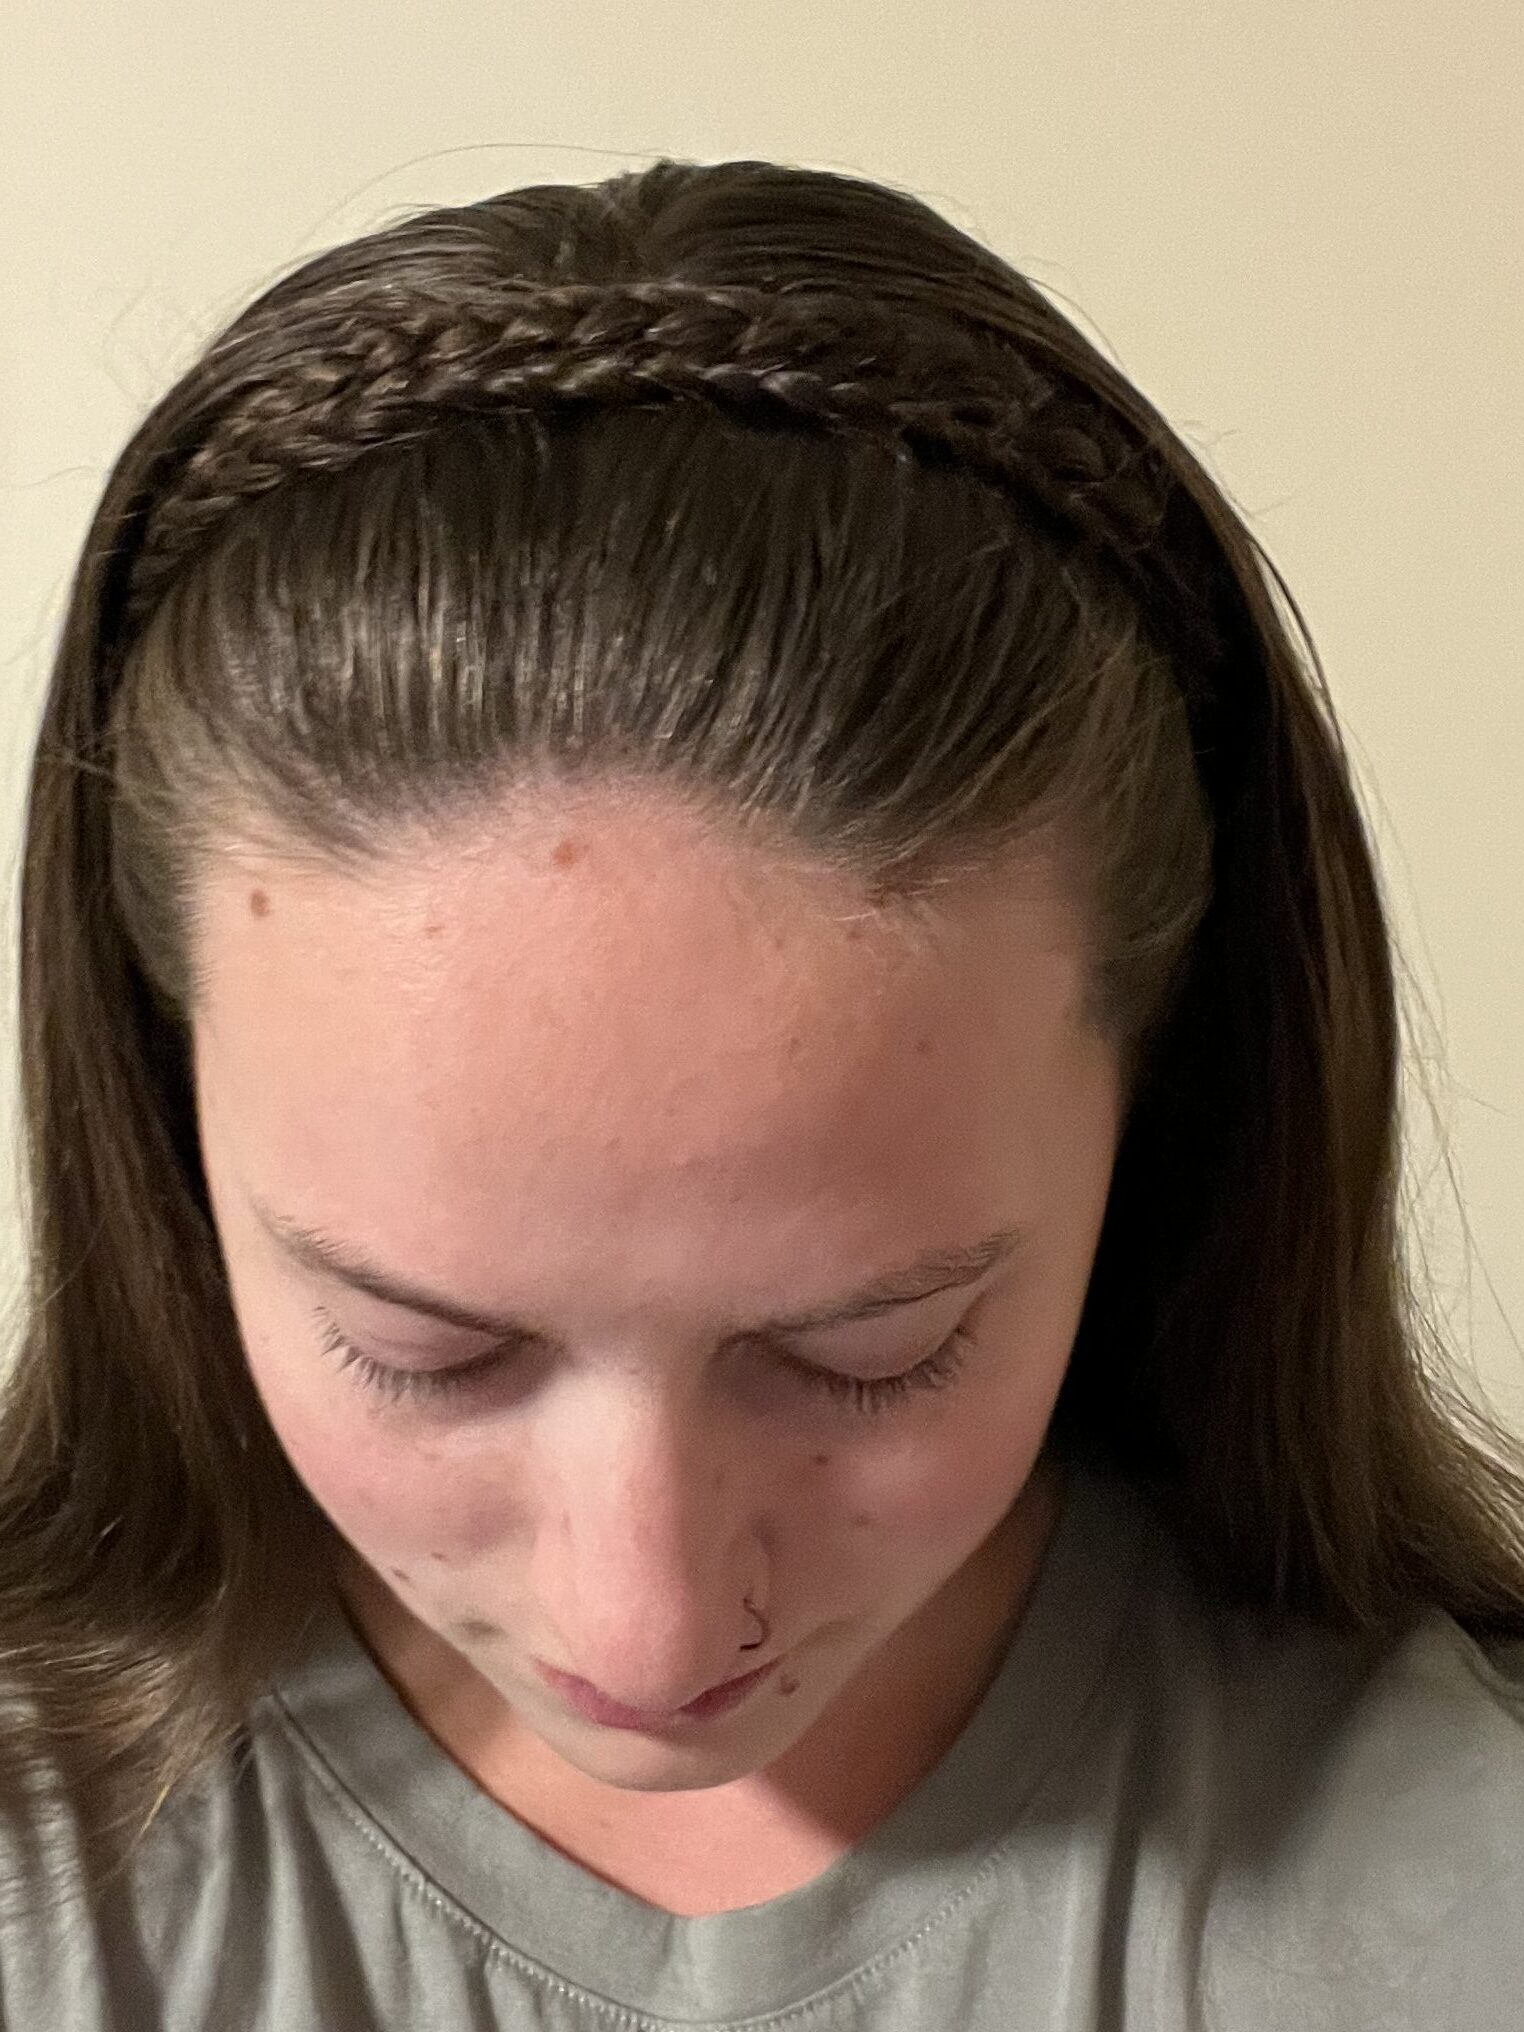
Attempt 2
Link to Braid Headband tutorial video on Instagram:
https://www.instagram.com/reel/DdmVZoNqdC0/?stkn=YTRyOGJicXMzOTI5
Proudly powered by WordPress